

food photos at Kooky Plate KL Key Takeaways
Kooky Plate KL isn’t just about quirky decor and playful plating — it’s a dream setting for your first steps into restaurant food photography.
- Master natural window light and the restaurant’s own warm bulbs for food photos at Kooky Plate KL .
- Use the unique tableware and colorful backgrounds to frame your dish without extra props.
- Edit with a light hand — boost warmth and contrast, but keep the details natural.
Why Kooky Plate KL Is a Perfect Spot for food photos at Kooky Plate KL
Walking into Kooky Plate KL feels like stepping into a playful art gallery that happens to serve amazing food. Mismatched chairs, pastel walls, and whimsical table settings make every corner a mini studio. For a beginner, that’s gold — you don’t need to bring a single prop. The restaurant does half the styling for you. For a related guide, see Kooky Plate KL: 5 Smart Reasons to Visit on a Day Trip.
But all that visual noise can also be overwhelming. The trick is to simplify. Focus on one strong element per shot — maybe the neon sign behind your pasta or the marble pattern on the table. By letting the venue’s personality shine without competing with your dish, you’ll get balanced, magazine-worthy frames.
Step-by-Step Tips for food photos at Kooky Plate KL
1. Find the Best Light (Without Moving Tables)
Good light is the secret sauce of food photography, and Kooky Plate KL has a mix of windows and warm indoor lights. Your best bet is to snag a table near a window during brunch or late afternoon. That soft, diffused natural light makes colours look rich and shadows gentle. For a related guide, see Kooky Plate KL’s Natural Lighting: 5 Benefits of a Cozy Atmosphere.
If you’re there at dinner, don’t worry. The restaurant’s warm bulbs create a cosy glow. Just avoid sitting right under a direct spotlight — it creates harsh shadows and makes food look greasy. Instead, angle your plate so the light hits it from the side at about 45 degrees.
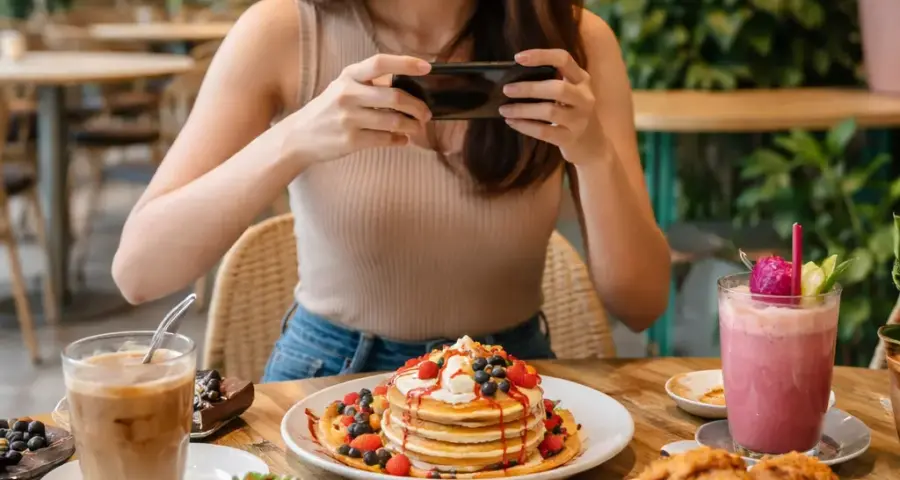
2. Choose the Right Angle for Your Dish
Not every dish flatters the same angle. At Kooky Plate KL, their signature pancakes and towering milkshakes look amazing shot from a 45-degree angle — you capture height and layers. Flat dishes like pasta or salads work better with a top-down (overhead) shot.
A quick rule: if it stacks, shoot from the side. If it spreads, shoot from above. Try both for each dish, but trust the angle that shows the most texture and colour contrast.
3. Use the Restaurant’s Decor as Natural Frames
The beauty of Kooky Plate KL is that every table setting is slightly different. Look for geometric tiles, retro tablecloths, or even a quirky napkin holder. These elements can act as foreground frames or background texture.
Place your dish slightly off-centre and let the patterned surface lead the viewer’s eye to the food. This adds depth without needing extra editing skills.
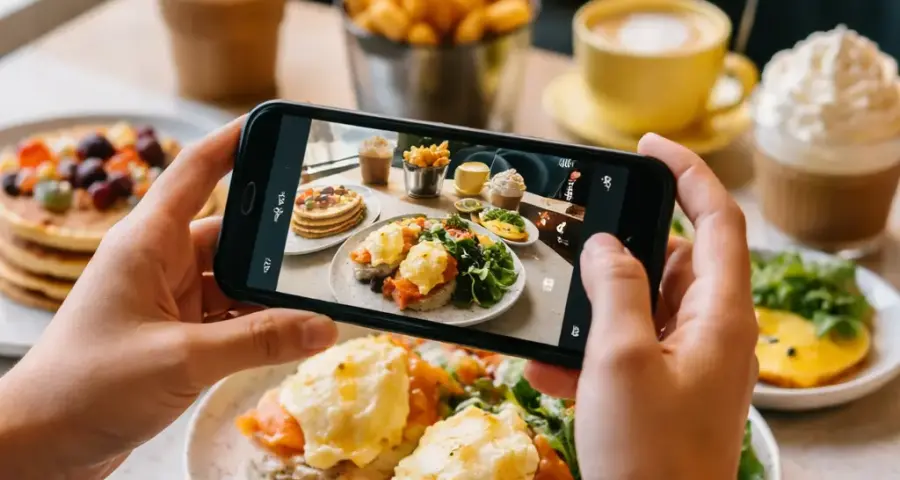
4. Keep Composition Simple with the Rule of Thirds
If you’re new to framing, the rule of thirds is your best friend. Mentally divide your screen into a 3×3 grid and place your main subject — the dish — where the grid lines intersect. Most phone cameras have a grid overlay option. Turn it on.
Avoid putting your plate dead centre unless it’s a symmetrical dish like a round cake. Off-centre placement feels more natural and dynamic, especially when you leave some negative space around the plate.
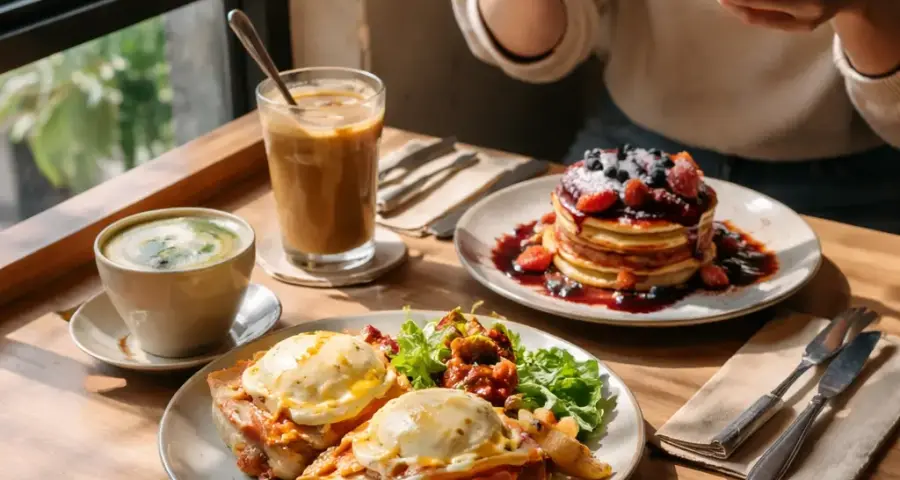
5. Don’t Over-Stuff the Frame
Kooky Plate KL serves generous portions packed with colour. It’s tempting to show everything in one shot. But less is more, especially for beginners. Crop out the extra cups, bags, or hands. Focus on the hero dish and maybe one secondary element — a colourful drink or a dessert spoon.
Tight crops also reduce the amount of distracting background, which helps your food stand out. You can always show the full spread with a second photo later.
6. Edit Lightly — Warmth and Contrast Only
Editing apps like Snapseed or Lightroom Mobile are great, but beginners often overdo it. For food photos at Kooky Plate KL, start by increasing warmth slightly to enhance the cosy lighting. Add a touch of contrast to make the food colours pop. Then sharpen the image a tiny bit for detail.
Avoid heavy filters that change the colour of the food. Red pasta should still look red, not magenta. The goal is to enhance what’s there, not mask it.
7. Test Different Perspectives in One Sitting
Before you start eating, take 30 seconds to shoot from three different perspectives: top-down, 45-degree angle, and straight-on. Review them on your phone. You’ll quickly see which one tells the best story for that particular dish.
This habit trains your eye over time. Plus, you’ll always have at least one solid backup shot if the first angle feels off later.
Common Beginner Mistakes to Avoid at Kooky Plate KL
Most newbies trip up on two things: using flash and forgetting to wipe the plate. Flash from your phone camera kills the mood — it flattens textures and creates ugly reflections. Turn it off every time. Instead, lean into the ambient light or ask your friend to hold their phone flashlight at a 45-degree angle from the side.
The other mistake is rushing. Kooky Plate KL’s staff are usually happy to wait a moment while you snap a shot. Just be polite and quick. A clean plate edge, a dabbed sauce splash, and a rearranged napkin make all the difference between a snap and a standout photo.
Final Checklist for Your Next Visit
| Step | What to Do |
|---|---|
| 1. Choose the right seat | Near a window during day, away from spotlights at night |
| 2. Pick your hero dish | Focus on one plate; keep extras blurred or cropped |
| 3. Frame with decor | Use a patterned table or colourful wall as background |
| 4. Shoot from 2-3 angles | Try overhead, 45°, and straight-on |
| 5. Turn off flash | Rely on natural or warm indoor light |
| 6. Edit minimally | Warmth, contrast, sharpness — no heavy filters |
| 7. Clean the edges | Wipe spills, straighten cutlery, push extras aside |
Useful Resources
Want to dive deeper into food photography basics? Check out this beginner-friendly guide from Digital Photography School: Food Photography Tips for Beginners.
For editing on the go, the Snapseed app is free and powerful. Learn its essential tools here: Snapseed Online Guide.
Now grab your phone, head to Kooky Plate KL, and put these tips into practice. Your next great food photos at Kooky Plate KL are just one snap away.
Frequently Asked Questions About food photos at Kooky Plate KL
What is the best time to visit Kooky Plate KL for food photos?
Late morning or early afternoon, around 11 AM to 2 PM, when natural light from the windows is soft and bright. Avoid peak dinner hours if you want a less crowded background.
Do I need a professional camera for food photos at Kooky Plate KL?
Not at all. A recent smartphone with a good camera is enough. Focus on lighting and composition instead of gear.
Can I use the restaurant’s props for my photos?
Yes, feel free to use the quirky napkins, coasters, and small decor items on the table. Just handle them carefully and return them to their place.
How do I avoid blurry photos in low light without flash?
Rest your phone on a glass or a napkin stack to stabilize it. You can also use your phone’s self-timer to avoid shake when pressing the shutter.
Should I ask the staff for permission before taking photos?
It’s polite but usually not required. Kooky Plate KL is a popular spot for foodies, so staff are used to it. A quick smile and “Is it okay if I take a quick photo?” is always appreciated.
What’s the best editing app for beginners?
Snapseed (free) or Lightroom Mobile (free with optional premium) are excellent. Start with the “Auto” function and then adjust warmth and contrast manually.
How can I make the food look more vibrant in photos?
Increase contrast slightly and bump up the saturation by about 10-15%. Also, make sure your white balance is set to “warm” or “cloudy” to enhance the cosy feel.
Is it better to shoot in portrait or landscape orientation?
Portrait works best for tall dishes like burgers or shakes. Landscape is better for wide plates or bird’s-eye views of a full table spread.
What if the dish is already half eaten when I remember to take a photo?
Take a shot anyway! A fork with a bite of food or a half-filled cup can look very natural and honest. Just frame it as a “mid-meal” shot.
Can I use a ring light or mini reflector?
Yes, a small ring light clipped to your phone works well for adding fill light. A white napkin can act as a DIY reflector to bounce light onto the food’s shadow side.
How do I capture steam rising from hot food?
Use a side angle and shoot quickly while the dish is still hot. A small, warm light behind the steam helps it show up. Don’t use flash — it kills the steam effect.
What background colours work best at Kooky Plate KL?
Pastel pink, soft mint, and warm wood tones dominate the decor. Neutral beige or light grey tables are safe bets. Avoid busy patterns that compete with the food.
How do I take a group shot of multiple dishes?
Step back and shoot from a slightly elevated 45-degree angle so you can see all plates. Keep the composition balanced — overlap plates slightly for a generous spread look.
Should I include people in the frame?
Only if hands holding a fork or a friend’s face adds to the story. Otherwise, keep the focus purely on the food and the table setting.
Can I take photos at Kooky Plate KL for commercial use?
You’ll need explicit permission from the restaurant management. For personal social media sharing, no permission is needed.
What if the lighting is uneven across the table?
Rotate the plate 180 degrees or move the dish to a better-lit part of the table. Even small shifts drastically improve the lighting balance.
How do I avoid reflections on glossy surfaces?
Change your angle slightly so the glare moves away from the lens. You can also cover the shiny spot with a napkin or tilt the plate if it’s safe.
Is it rude to take a long time photographing my food?
Try to keep it under two minutes per dish. Most diners and staff are fine with a quick snap session. If it’s busy, be extra considerate.
Can I use portrait mode on my phone for food?
Yes, but only if the dish has clear, distinct edges. Portrait mode works well for fruits, stacked pancakes, or drinks. For flat dishes like pasta, it often blurs parts you want sharp.
What should I do after taking the photos?
Review them immediately. Delete any blurry or badly lit shots. Edit your top three and share them with a fun caption about the Kooky Plate KL vibes.